Български
  Čeština
  Dansk
Dansk  Deutsch
  Eesti
Eesti  Español
  Français
  Ελληνικα
  Hrvatski
  Italiano
  Latviešu
  Lietuviškai
  Magyar
  Nederlands
  Norsk bokmål
  Polski
  Română
  Русский
  Slovenčina
  Slovenščina
  简体中文
简体中文  Tagalog
  Tiếng Việt
  العربية
  Português
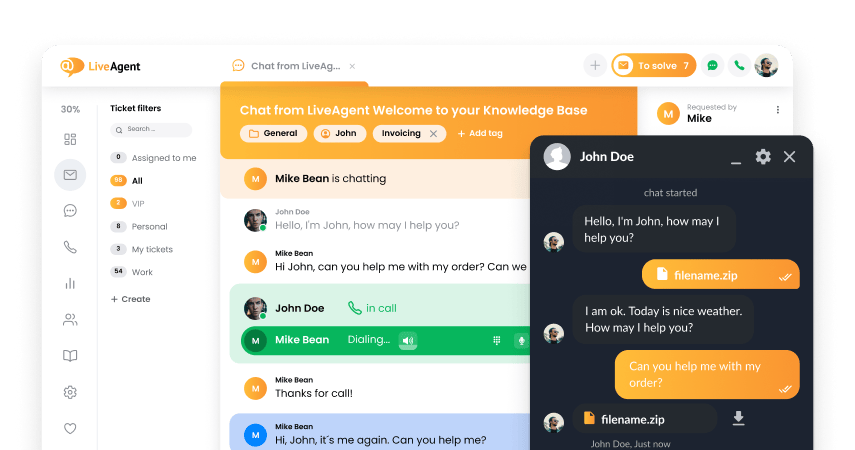
 LiveAgent Webinar 3: Live Chat & Chat Invitations
Learn how to set up and customize Live Chat, manage online visitors and chat history, and configure offline button feature in the third installment of LiveAgent's webinar series. Get the most out of your Live Chat with this informative video.

LiveAgent Webinar 3: Live Chat & Chat Invitations
Topics
- Setup and installation process of Live Chat
- Built-in chat feature within LiveAgent
- Managing online visitors and chat history
- Configuring Live Chat
- Offline button feature for managing chat availability
- Customizing chat window and welcome message
Video summary
The video covers the setup and installation process of Live Chat on websites. The first part covers the built-in chat feature within LiveAgent, while the second part covers the actual Live Chat. The Live Chat feature allows managing online visitors, chat history, chat reports, and chat settings. The configuration process involves creating chat buttons, choosing the department, language, and pre-chat form. The offline button is a crucial feature for managing chat availability. The chat window allows customizing text and welcome message.
Video transcript
we want to cover the live chat how to
get it set up and installed on your
websites but first I wanted to show you
guys actually we have another chat
feature in lavage and as well you could
see here we actually have a built in
chat with your agents as well so we also
have internal chat communications so you
can see here if you're at your dashboard
and you see your agents list here or
your online agents up here you can
actually click on their name the little
dot next to the name and leave them a
message right here in the system as well
so we also have this chat built in you
can just click here even if they're
offline you can see he's not online
right now but it's gonna pop up this
little chat window here and you can
actually chat with your team built into
live engine now he's offline right now
but if I were to type from a message
like I need help when you log in and you
send it it's actually gonna pop up on
the agents screen the next time they log
in so you can use this it's pretty
pretty helpful you know maybe if your
other agent is offline you can send them
a message
next time they log in it's gonna pop up
right away and they will be able to see
that message so you haven't got this
built-in chat as well now let's go over
the actual live chat here so you're
gonna see this vlog chat button here
this is where you click and you're gonna
get your chat dashboard your chat
overview screen so this from this screen
right here you can manage everything
about your live chat so first of all
you're gonna see here your chat overview
from this screen the chat would be the
first one you're gonna get you'll be
able to see all of your online visitors
on your website so once you actually add
a chat button to your site you'll be
able to see people browsing on your
website you'll be able to see if you see
anonymous here so we don't know this is
you know this guy we don't have his
information anything like that so we
have some
some customer on our site right here so
you'll actually see a list here a longer
list this is just my test website so we
only have one person there but yeah once
you had actual website you'll be able to
see all of your online visitors you'll
also be able to see you know people that
are actually chatting right here waiting
in queue ringing how many agents you
have available for chats you can manage
all of that from this chat dashboard
right here you'll also be able to see
chat history here you can just click on
chat so you're gonna see a complete list
of chat history tickets
you also be able to see a complete
history of your online visitors here
their IP address things like that you'll
be able to see in this list then you
could also manage your chat reports from
here as well and chat settings so all of
that can be managed from this chat
dashboard section now to actually get
the chat set up let's let's go over that
first so you're gonna see here your
configuration your chat buttons so this
is where you'll be able to create chat
buttons the actual button you're gonna
place on your site and you can create as
many as you want from here so if you
want to add you know a different chat
button to a different page you want to
change how it looks you can do that from
here so you can create as many as you
want you can add them to different
websites it's completely up to you
so we go here to the chat buttons and we
can actually create some buttons here so
you see I already have some created but
when you come here you know it's gonna
be blank so we need to create one first
so you can say create and now you can
choose which button you want to use
right from here so you know you could
choose which one you want we have a
bunch of different options here we also
have an option if you want to do custom
you can actually upload your own image
so if you have a picture of what you
want for the chat button just upload it
here and you can use that picture or you
can write your own code with HTML as
well and then we also have an option for
inline button which means if you want
the button to you know stay in the page
you can embed the button here with one
of these or you can even use like for
example text if you want to just have
someone click on some text in your page
and starts the chat you can use this one
right here so we have that option as
well so let's just go ahead and for the
sake of this demo let's just select one
of these let's go with this let's maybe
what this blue one here
now it's going to load up the button and
the options for the button so let's go
over this really quickly you're gonna
see here a few options when you're
creating the button now you can name the
button what you want you can choose
which Department the button goes to so
this is very important right here this
might be the most important setting so
when someone clicks on the chat button
it's going to route to this department
here so you could choose if it's your
sales button or technical button let's
say we want this unlike our sales page
so that's going to go to the sales
department so now you're gonna know all
chats coming from this button you know
are going to your sales department so
you can set that there you could choose
the language for the button it's gonna
translate all the all the icons on the
button into this language now we have
options for if we want a pre-chat form
or offline button so these two boxes are
very important actually so you're gonna
see when I check this box it's gonna add
some more options here to the left so we
can actually get information through a
pre-chat form here so what this means is
you can click on this it's gonna open up
our knowledgebase article and you can
read more about it but what it means is
you can actually ask for the customers
name or email or anything you want
before they even start the chat so if
you leave this blank
you know they click on the chat button
it's just gonna start the chat right
away but if you click on this you're
gonna have options for the pre-chat form
here so you can actually click on this
and you'll have options here to get like
for example name email phone number
order ID whatever you want to add you
can add some fields here then they click
start chat then you know they'll start
the chat and anything they've entered in
you're going to get that information
added to your chat ticket so we can go
over that as well now let's see here so
also guys I forgot to mention any point
in time if you have any questions or
anything just write it into the into the
webinar chat I'm checking that as well
so feel free to
you know read your questions in that
chat so we can do pre-chat form if you
want to gather more information it's
pretty stuff you know pretty
self-explanatory here you'll add the
fields right here you can even let them
choose the department you know drop-down
menus all of that is customizable here
now let's go to the actual button and
let me show you really quickly here if I
ask their email am I able to receive the
message into my email if I'm not
available in the chat yes let me
actually there's actually we actually
have a feature exactly for that I was
about to go over but I can I can explain
it right now basically in the overview
here you're gonna see besides the
pre-chat form there is an offline button
option and what this means is you can
click on this and what this means is if
no agent is online it's gonna show an
offline button instead of a chat button
so basically we recommend to turn this
on so you're gonna see here if you leave
this blank
and nobody's online for chat the chat
button will automatically disappear from
your website it's set up to do that so
when you click this instead instead of
it disappearing it's going to turn into
an offline button so you can see when
you're online this button is blue right
and they could chat here but when you're
offline you can go to the offline button
it's gonna turn into this grey version
now what this means is nobody's online
for chat that means nobody has that chat
available so it's gonna turn to grey so
it's basically gonna go to offline
button and now when they click on that
button it's gonna open up this form here
where they can leave their name email
whatever you want and leave a message
and it's gonna create a ticket directly
into live agent for you so just turn
that on no one's available and now
you're gonna have this contact form
ready to go so I recommend you know you
guys use take advantage of that it's
pretty great pretty good
feature okay so now let's go back to the
online button so now a few other things
I wanted to cover here all of these
fields is pretty self-explanatory you
know if you want to add some animation
to the the button you can add it here
you know change the colors all of that's
customizable here now the next part is
the chat window this is where you can
you know add text here you can add a
welcome message so that whenever someone
clicks on the button it's automatically
gonna add this message here so like you
know hi can I help you so now when
someone clicks on the button it's just
gonna load this right away your agent or
you don't have to type this every time
so you can add a message to
automatically appear you could choose
from our different themes here for the
for the chat window we have a few
different themes you can pick you know
colors it's all customizable here
all right now we've got the chats set up
here we got the chat forum we got the
pre-chat form so everything looks good
we can just hit save and now our chat is
ready to go once you've hit saved all
you have to do now is go to integration
here and copy this code and paste it
into your website where you want it to
be and that's it the chat will be ready
to go you could you getting and paste it
into the footer of your website and
it'll add it to every single page of
your website as well so you can do it
like that or you could place it on just
the pages you want it's up to you so
once you have it there chat is ready to
go once you have it on your site now
you're gonna be able to see in your
overview section online visitors and
we're ready to start chatting now we
have the chat button set and I'm gonna
go over an example of a chat in a minute
but first of all we also need to do the
settings as well so let's go over the
chat settings really quick so after you
add the button you're going to want to
do the settings as well to make sure
your settings are right so you can go to
chat settings here and now first we have
chat routing this is important with you
know bigger teams how do you want to
manage the chats getting routed to your
agents so we have four different options
here you can do random assignments so
whenever someone clicks on the chat
button it's gonna randomly go to an
agent we have max utilization which is
gonna give it to an agent with the most
number of chats to keep them chatting so
basically other agents can be free to
work on email as well one agent is
chatting all the time we have that
option
ABB's utilization is going to distribute
the chats evenly to all of your agents
and then ring to all this is going to be
like song sort clicks on the chat it's
gonna bring to every agent and first
person to answer it will get it so we
have those options available
now you're gonna see when you click on
one of these two in the middle it's
gonna pull up the priorities if you have
it on random there's no priority but you
put it on like average or max you can
set priorities here for the agents so
you know if you set like this is me here
John Gurdon if I set it to one shots are
gonna go to me first then Vince number
two
so you can set you could set priorities
for each of your agents as well I'll
hold on we have a question here my live
agent doesn't look like yours do an
updated version um this is actually a
newer theme we just released and you can
actually set it to this one as well we
wanted to show off the new theme you
know in our in the webinar here so you
can actually change it to this theme as
well I forgot to mention guys yes looks
nice and indeed yeah definitely so if
you just click on your profile here it's
gonna be the default soon but right now
it's still in beta and if you go to
settings you can choose material theme
right here oh yeah I would recommend
going for this theme you look it looks
way better and it's it's got some cool
features and nice colors as well so yeah
you can just click beta material theme
right here hit save it and you're gonna
have this theme as well so everyone
should have it hmm yeah so you can set
the priorities here that's we got that
done we're gonna be good to go on the
routing then a few other options we got
we have you know routing time this is
like it's gonna ring to an agent after
30 seconds if they don't answer to go to
the next agent so you can set routing
time here if you want it to be faster
you know just put it like 10 inactivity
time is how long how many minutes until
it's chat will become inactive and an
agent can get another one
this is like 20 minutes you could set
this what you want
show customer typing this is going to
show the customer typing before they
send the message you can see what they
they've actually written out after a
chat ends do you want it to be an
answered ticket or resolved tickets
and if you miss any chance do you want
to be a new ticket or do you want to
just delete them
you could set that there as well so we
want it to be new so in case nobody
answers the chat it'll just open a
ticket for us so let's go for new there
alright so now I got the chat setting so
now we're good to go there
now the final step is to actually turn
chats on this is this is important as
well
you can be logged into live agent but
you can you can also be turned off for
chats so you could be logged in and not
getting any chats because you don't have
the chest or none so you could turn it
on right here you're gonna see in the
top right we have some icons here this
is for email chat and phone so we can
turn on chats right here you're gonna
click on this and you're gonna see if
you have chats turned on and off first
of all it's this big switch the master
switch here but then down below is all
these are the departments so you can be
online for chat in only certain
departments if you want so for example
you only want to be online for your
sales chats just just click sales right
there and you're gonna hit save now
you're only online for sales but let's
just do for the sake of this I'm just
going to turn them all on so now I'm
online for all the chats and now we can
start getting chats so this is important
to know if you want to if you want to
log into live agent but don't want to be
online for chest you could turn it off
right there so you know you have that
option there okay so now we're online
we've got the settings set up so now
we're good to go let's let's just do an
example chat so let's go to my I have a
test page here this is my test
knowledgebase
so we can we can do it a chat right from
here I got the chat button added to the
knowledge base you could add it to your
knowledge base as well you're gonna see
here we've got the live chat and it's
gonna start the chat right away and in
the back and it's gonna be ringing if
you can't answer it here we've got those
state-of-the-art sound effects going on
all right so now we answer the chat this
is how it's gonna look for the agent and
if you were familiar with live agents
you know the ticketing is you're gonna
be right at home here it's basically it
looks exactly like a ticket you're gonna
see that right away so it's the exact
same format as a ticket here you're
gonna see you know at the top of the
screen chat started from your welcome
portal I'm you're gonna see the URL
they've started it from so you're gonna
get all this information
right here when they start the chat
that's URL if they're using mobile or
Chrome or Windows you can see that here
the P address and which button they
actually clicked on so you're gonna see
that right from here now you can see
I've answered the chat I'm logged in as
Andre here and I can type to the
customer hi from here and from the
customer screen it's gonna look like
this now it's pretty it's pretty
straightforward guys you're gonna see
here we have options for you know
sending a chat transcripts the customers
can actually get a copy of the chat from
here as well we have that feature we
have options for attaching files they
can even drag and drop pictures into the
chat you know we have option for
minimizing it they can make it smaller
pop out the chat they can pop it into a
standalone window as well and this will
also follow them if they go anywhere
through your site if you have the chat
button added to your each of your pages
and they switch pages on your site it's
going to stay with them so they can keep
chatting and going to different pages
here now the customers can type
something up
even when they're typing like I said
earlier you'll be able to see that here
you know you're be able to see the
visitor typing up a message even before
they hit sends you're always gonna know
you can even prepare your answers ahead
of time even before they hit Send and
have your answer ready to go now
when they actually send it here you know
it's gonna come through just like this
you're gonna get sound effects to know
that they've sent it you'll be able to
see it here now a few other things in
the chat we can do we have options for a
few different options a few different
buttons you can click on right here let
me just go over these you can assign the
chat to yourself if you want to assign
this ticket to you this is a good
feature when you click on this after the
chat is over it's gonna automatically
open the chat as a ticket for you so
this is useful if if you know that you
need to maybe follow up with the
customer after the chat is over just
click on that assign to me it's gonna
assign it to you and after the chats
over you're gonna have a ticket assigned
to you so that's a good feature you know
if you need to follow up the customer
just click on that and now you've got a
ticket assigned to you we also have a
button for inviting agents if you want
to invite one of your colleagues into
the chat you can do that here just click
invite and you could choose their name
from this list it's gonna show you
everyone who's online so if I want to
invite him in I can't just click on this
and click on his name and he can join
the chat as well you can have multiple
agents chatting at once in the same chat
actually so that's not a problem he can
join in and you can both be chatting
with the client we also have a button to
transfer the chat this is different from
inviting this actually you don't choose
a person you just choose a department
and what do you transfer to that
department like let's say we want to
transfer it to client management we hit
transfer it's gonna just send the chat
to that department and one of those it's
gonna ring to everyone in that
department and one of those agents can
pick it out
so maybe the customer clicked on your
sales button but it's like a technical
question you can just transfer it too
technical and yeah one of those guys
will pick it up so it's good for moving
the chat around then we also have the
and button of course we can cancel the
chat as well right from here so let's
cancel this here let me let me guess a
bit bigger actually it'll go so few
other options down here so those are the
options up top and we don't want to end
it yet so let's keep going here few
other options we have the attachments
here you can attach images things like
that but also it's drag-and-drop
friendly so you can just drag in the
pictures you want to send to the client
clicking here will give you your
predefined answers you can messages so
you can click on this and choose if you
have some things you're always sending
to the customers you can click on that
here and load up a message right away so
we have this one ready to go about our
pricing something like that you can
click and choose it so your agents can
use these during the chats you know to
send longer messages if you're sending
the same message all the time you can
just use these canned messages and send
them like that to save you some time
then we also have an option for writing
a note in the chat basically it's like a
tick you know when you're writing a note
on the ticket this is just for your own
purposes so maybe like you know need to
follow up with this customer after the
chat and just hit enter it's gonna add a
note to the chat so you only you will be
able to see this only the agents can see
this this is not gonna be sent to the
client so you can write notes in the
ticket as well now you're gonna see here
basically the clients name in this chat
just says visitor right it's gonna do
that because we don't know who this guy
is he just came to our site he just
started to chat you know we have nothing
we have no information on him but let's
say you know his name or something and
he gives you his email or name some
point during the chat you can actually
set
his name right here so you're gonna see
on the right side we have the visitor
this is the ticket owner right this is
the chat owner we can actually set his
name so if we know this is uh you know
John we're gonna set him here or we
could else abandon his IP address this
is useful if this is like you know some
guy that's just spamming your chat you
can you can ban him right from here as
well but let's set them as John we know
this is John here so we type in John and
it searches our contacts actually in
live agents you can see you typed in
John we can create a new one or let's
say we know it's one of these guys here
we can set him so let's say okay it's
actually this guy and now you're gonna
see set requester and now it's gonna set
him as your client you know John Gurdon
here so now you can see it's changed it
to this clients and now we can actually
see his history with us so we know who
it is so now we've got his complete
ticket and chat history on the right
side here
oh you could see you know four days ago
you just click on this and actually see
you know what the client has said so
while you're chatting with him you can
review his history and see what's going
on as well now this also works if you
have a pre-chat form and you ask for
their name or email and in that pre-chat
form you know the customer fills it out
and then starts the chat
that's even better you're gonna have all
this right away if you know this if Jon
Gordon comes here starts the chat fills
in the pre-chat form with his email or
name it's gonna load all this
information so once he starts to chat
you're already gonna see everything
about the client right here so pre-chat
form is a great way to to do that now we
got his history here we go so see you
know his notes everything about the
client you can see right here you could
even click on his name edit his profile
right from here so you can do all this
while you're chatting with the customer
now one of the you know one of the big
advantages of live chat is the actual
ability to be multitasking while you're
chatting so you can have multiple chats
at one time you know so agents can have
two three four or five chats it's up to
you
that's one of the big advantages so you
can see here if I had another chat going
on you know I could be switching at the
top here live it's gonna create some
tabs at the top you could switch between
your chats and tickets so you can be
working on let's say you're working on
an email over here you know typing up
something and also chatting over here
you can you can do that in the system
you can completely multitask and one of
the settings I forgot to mention is each
of your agents you can set a chat limit
for them so when you're editing the
agent's profile if I edit my profile
here you're gonna see the first setting
here is max chat load so you can
actually set how many chats each agent
can handle so I got set to 3 but maybe
I'm like an expert on chat so I can do 5
at a time you could set this for every
age in here so it's up to you in the
agent settings
you could set you know each agent 5:3
whatever you want so you can set their
limit and basically you know I haven't
set to five so now I can actually get
five chats at once right from here okay
so going over all these settings here so
after the chat is over you know we can
click into the chat and you're going to
see I have closed the chat out and it's
actually opens up a ticket right here
for us so after the chat is over you're
gonna see it opened up a ticket and it's
gonna be saved in your ticketing section
automatically all of the chats are gonna
be saved you're always gonna have
complete chat history you know with your
account it's saved in the cloud you get
unlimited storage with us as well so you
don't have to worry about chat records
getting deleted nothing like that
they're all going to be saved as tickets
for you now on the customers and let's
go over here
after the chats over we have the built
in feedback here did Andre help you yes
or no and he's chat window has different
it's gonna look different here than here
so this one says yes or no but our new
actually are newer themes this is like
an older one I think the newer ones have
smiley faces as well so you can click
they can click on smiley face to leave
feedback so we can do yes here and then
also they can leave a comment so you
know cool dude here hit Send and you'll
actually be able to see that feedback in
the system here so in the chat you know
after it's over you'll see we got the
smiley face and the comment right here
so you can actually see this here and
you'll be able to see this in reports as
well so you can review you know all your
chat feedback see how your agents are
doing monitor all of that feedback right
from here so we got that built in now
you'll also see after the chat is over
that the customer can even start the
chat again right from here there's a
button there so they can start it again
it's gonna start it in the same ticket
for you so it looks good and then also
like I said earlier request a transcript
they can just send a transcript here
it's got a is email loaded push okay and
just like that they can get a copy of
the chat so you know a lot of times your
customers will say hey can you send me
this chat after it's over yeah just
click send me a transcript there's a
button there I mean it's gonna
automatically send it to them so we got
that built in as well and you'll see
here transcript successfully sent so
they know they got it all right so now
in the backend you'll be able to see
you'll even be able to see he requested
a transcript so it was sent we know he
got it now the chat is over like I said
it's created a ticket for us
automatically so the cool thing about
the chat is it's completely integrated
into live agent you know as a seamless
multi-channel ticket here so you can see
it goes from chat right into a ticket so
if we wanted to let's say follow up with
the client after the chat you can just
click here and actually email him right
from the chat so you know maybe the case
wasn't closed you know he needed some
help and you need to follow up with him
you could do it right from here you know
just sent him an email like thanks for
the for the chats your order is on the
way now so just like that we can send
them an email after the chat is over and
yeah you're gonna see right in this chat
right in the chat ticket you're gonna be
able to see that email here so it goes
right from chatting straight into email
conversation so you know if you if you
close this out it close out the ticket
and you know you open it up somewhere
down the road you're gonna be able to
see like if I open it back up and you
know he responded you're gonna see the
complete history here so you're gonna
see okay we can scroll up okay he
started a chats and now we've emailed
him and this is what's going on so
you're gonna be able to see it all right
in this ticket it's gonna keep it
organized
for you now we've heard the chat
following up on the chat as well let's
go over a one other feature with the
chat as well so besides the actual chat
buttons we also have a nice feature for
proactively engaging the the user with
chat as well we have these invitations
here so we have chat invitations and
basically these are going to pop up on
the page you want and actually reach out
to the customer ask them if they want to
chat so you can create invitations here
you know put them on your home page put
them on your price page and they're
gonna trigger you know after a certain
amount of time and they're gonna pop up
on their screen asking them to chat so
we can set these up as well these are
really useful so basically it's just
like the chat button you create as many
as you want Adam to your different pages
however you want to do it it's up to you
so we can just do you see I've got some
created here already you know we can
create one from here it's same as the
chat same process you know select one
here and yeah you're gonna see the same
options here so basically it's got the
chat window you can customize that you
customize the invitation how you wanted
to look what you wanted to say all of
that is done here and then the only
thing that's different is actually the
conditions so time spent on page this is
going to be how long until the
invitation is triggered so you know if
you want it really fast do five seconds
or if you want it after all you know 30
seconds it's up to you so we can hit
save and you know add it to the page we
want and now we have an actual
invitation that's gonna reach out to
them they click on you know yes start
the chat it's gonna ring to you the same
way so we have this option as well now
there's one
more option to starting the chat and
that is if you see the clients actually
on your website here you can even start
the chat right from here just by
clicking on this button here it is going
to invite them to chat you can just
click on this so let's say you see them
you know on your home page or maybe your
pricing page and this is gonna say how
long so you see them he's there for 40
minutes we can invite him and we're
gonna choose which invitation we want to
send him so this is based on your
invitations let's do this one sales b2b
sales it's gonna open up a chat just
like that's gonna send your invitation
message how can I help you and on the
client screen it's gonna pop up right on
this screen here with the chat and it's
gonna open up ready to go right here
with him table whoops so let's go back
here so just like that you can start
chatting with the clients you know it
works the same way but basically it's
gonna say here that you invited him to
chat so you're gonna see that here
alright now one other thing with the
chat I forgot to mention earlier is you
can actually see the pages your client
is visiting as well in real time so if
the customer switches pages you're gonna
be able to see that here on the right
there's a page visitors section here
that's gonna load up the pages they
visit so if they actually switch pages
you'll be able to see you know which
page they are on right now which pages
they are on in the past as well you'll
be able to see all of that right here so
while you're chatting with them you're
gonna know exactly which page they are
on here so let's go ahead and end this
one and let's close it out kind of close
out these other tickets as well so
besides the actual chats we have it also
here the chat report
so you'll be able to see you know chat
load chat availability you're gonna be
able to see you know peak time of your
chats coming in for the day you'll be
able to view that in your reports here I
don't want to go too much into detail
about reports we're gonna have a
separate webinar going over reporting
details in the future but for now just
know you could access all these chat
reports from here as well you could see
you know chat availability when your
chat has been online you'll be able to
monitor all of that from here as well
yes so guys does anyone have any
questions at this point about the chat
or maybe something in particular you
wanted to see with the chats okay okay
we got a few questions here what's the
difference between chat and invitations
the only difference is the invitations
are like pop-ups on their screen the
chat buttons are gonna be actually a
button just sitting on your website like
like something like this you know if we
go to I'll just show you let's go to
let's go to live agent comm you're gonna
see this is a chat button and if we go
to our pricing page I should have a
invitation pop-up the invitation is just
basically a pop up on your screen that's
the only difference the chat buttons
just sit here invitations are gonna pop
up and you can click on it and start the
chat other than that they work the same
way
okay okay we have another question here
if I'm online but not able to answer
well I get the chat message the customer
sent to my email - what will happen with
the message yes it's going to basically
the way it works is if you're online but
not able to answer what's gonna happen
is the customer is gonna click on the
chat and it's going to say that you know
it's calling an agent for them or
something like that you can customize
the text and they're gonna know that
they're waiting you know for a response
like they're waiting in queue and while
they're waiting
anything they type there's a you can say
that they can type there's basically
it's gonna say in the chat window that
they can type a message or leave a
message or type their message while
they're waiting and anything they type
and if they cancel the chat it's gonna
create a ticket for you automatically in
here so let's say let me just show you
here you're actually going to see
there's an option for that here and it's
raged right in here I believe online
[Music]
it's somewhere in here
but it basically says when you are not
online enable offline message right here
basically if you have this box checked
and they type something in and they
close out the chat and they leave it's
going to open a ticket with whatever
they chat whatever works whatever they
typed in so it'll create a ticket for
you there so can you remind me what
happens if no one answers the chat yeah
so if basically like I was saying
earlier if no one's online the chat is
not gonna show or it's gonna show that
offline button so you know we recommend
you know I'm turning it off but yeah if
you have it on and no one answers the
chat basically it's going to when they
click on it and you're online but you're
not answering it there's gonna say that
you know they're waiting for an agent
and they can leave a message so anything
they type or you know they close it out
it's going to show as a new ticket and
if you if they don't type anything it's
gonna create a new ticket as well and
say that you missed a chat
doesn't unanswered chat depend on your
settings yeah basically like I said if
you don't have anyone online there's not
going to be a chat available for them
it's gonna be the offline button instead
or if you miss the chat it's just going
to be opened as a new ticket for you in
your ticket section here
is it possible to connect live agent to
a chat bot like dialog flow at the
moment no we don't have any integration
with chat bot we are really you know
we're looking into that of course and we
are working on making some integrations
down the road but at the moment we don't
have any chat bot integrations but more
info to come on that soon
you
I'm off the office quite a lot and just
with my phone it would be nice to have
the chat sent to my email yeah
definitely there is an option for that
actually basically we can have we can
set up a rule to notify you if you've
missed a chat or if there's a new ticket
actually um you could set up right in
here you can set up a rule to actually
send a notification to your email now
you could even do it in your settings as
well in your profile settings there's
email notifications so if you just do a
new ticket is created in your department
you check this box and hit save it's
gonna send you an email if there's a new
ticket and this counts for the chat
ticket as well so if you miss the chat
and it creates a ticket for you it's
gonna send you an email right now so you
can do an email notification right here
and if you wanted to do it with the rule
you could do even more customization so
if a chat has started or something like
that you can have an email sent as well
you'll see here apply when chat is
started you know you can add a chat
message there's a lot of options you can
do for chat started and what you want to
do here you know you can have it send an
email as well send a notification so
there's a lot of things you can do with
the rules here is the message included a
notification - yes it's gonna it's going
to be a preview of the message so if
it's really long it's just going to be
like a preview but if it's short it
should have the whole message there
is there a way is there going to be a
way for the knowledge base to also be
shown an option if a chat is unanswered
there is an option to show articles to
them so basically if they click on the
chat and no one's available you can
actually suggest some articles for them
so that's actually in the chat button
settings here let me just show you
really quick we go to one of our buttons
and let's edit this button here and
let's go to the offline button so if no
one's online it's gonna show this
offline button and let's go to the forum
here so if no one's online they click on
it it's going to show this forum here
and you can see knowledgebase here
include suggestions so for this button
you can choose which articles you want
to show them so we can select a category
let's do products so we want to show
them this products category now when
they click on this button it's going to
suggest them articles from this category
here so you can put a description here
so you can suggest them articles right
here in the contact form the settings
that you shown on the agent profile can
I set those for all the agents so they
don't have to set it themselves yes you
can do that when you go to edit your
agents here just go to your settings and
your agents you can actually edit them
here and change their settings as well
and so let's say we want to add those
notifications for Martin we'll just
click Edit email notifications just
check it for him hit save and now he's
gonna get them as well so yeah you could
change their settings right from here
you can even turn them on or off for
chats like if you if you see that Martin
he's you know logged in
he's online and he doesn't have chats on
be like hey I'm turning your chats on
for you men so just hit save and now
he's gonna get chats going to him so you
could set that here as well you can even
set their chat you know chat load and
you could even set their chat priority
from here
that's great the offline button in
knowledge base which does not have mine
set to because I'm off and away from the
desk I was wondering if a similar option
exists if I set to online and I can't
answer the live chat oh no unfortunately
not for the online there's no option for
that that's a good suggestion
but yeah online no it's only for the
offline actually however though with the
chat button you can suggest the articles
before they start the chat so when you
edit the button here let me show you
that as well
in the pre-chat form you can suggest
articles as well so pre-chat form you're
gonna see the same exact options here's
include suggestions from and you can
show them relevant articles in the
pre-chat form so before they start the
chat you can show them some articles
here as well so we do have that option
in the pre-chat form
no problem Ellen hmm okay guys anything
else you guys wanted to see about the
chat
alright alright so looks like no one
else has any other questions at this
point yeah like I said it was gonna be a
short webinar just wanted to cover that
how to get it set up and going and all
the different you know tips and tricks
available there
can we nudge people I had someone
started conversation then disappear
nudge people oh so like if you mean like
they're starting a chat and then all of
a sudden they're not replying basically
you can just send another message it's
gonna give them you know a sound effect
basically that's it so I would say just
just send more messages in the chat ask
them if they're there because every time
you send a message they get a sound
effect so that would probably the best
way yeah so guys thanks again for
joining me this pretty much concludes
the webinar thank you again I'm gonna
send out actually I'm gonna send out a
replay this as well we're gonna we're
gonna upload it to our webinar series so
I'm gonna send you guys a copy and you
can check it out review it show it your
cheer to your team as well and yeah
we're gonna have more webinars to come
covering more more features in the
system so guys thanks again for joining
me and I'm gonna wish you guys a great
day and end it right here so take care
thanks again guys useful reminder
so take care guys sound as one about
Using LiveAgent Webinars to Optimize Live Chat Efficiency
Understanding the LiveAgent live chat feature is crucial to deliver efficient and prompt customer support. Live chat is a key feature for businesses looking to improve customer engagement and support operations. It allows businesses to provide real-time support, leading to higher customer satisfaction rates. LiveAgent webinars provide insights into live chat’s various capabilities. They offer in-depth explanations of the features, including chat invitation rules, widget customization, chat surveys, and canned messages. These webinars also offer step-by-step guidance on how to set up the live chat feature correctly. From configuring chat widgets to designing welcome messages, the webinars cover all the necessary steps to enable businesses to set up the live chat feature to their specific needs.
LiveAgent is a comprehensive customer management software that streamlines communication across different platforms, offers a native live chat, and a virtual call center solution. It provides detailed analytics and reporting to optimize support metrics and offers a customizable customer portal with a knowledge base. Trusted by top companies like NASCAR and Forbes, it helps businesses offer superior support and strengthen customer relationships.
LiveAgent Webinar 4: Multi Knowledgebase
The LiveAgent Multi-Knowledge Base feature allows businesses to manage multiple knowledge bases from one account, each for an additional $19 a month. There is no limit to the number of knowledge bases that can be added, and the feature is especially useful for businesses managing multiple brands or businesses under one support system. The feature also allows for SSL certification for added security.
LiveAgent's video call feature allows businesses to communicate in a more personal and interactive way, creating a more engaging experience for customers. It also provides flexibility in communication and can increase customer satisfaction by providing a more personal and engaging customer experience.
LiveAgent is a comprehensive customer management software that streamlines communication across different platforms, offers a native live chat, and a virtual call center solution. It provides detailed analytics and reporting to optimize support metrics and offers a customizable customer portal with a knowledge base. Trusted by top companies like NASCAR and Forbes, it helps businesses offer superior support and strengthen customer relationships.

Our website uses cookies. By continuing we assume your permission to deploy cookies as detailed in our privacy and cookies policy.